
A faulty circuit breaker is very dangerous and it increases the risk of an overload current for appliances. An overload can cause a short circuit that will damage appliances and can pt the house on fire. That’s why testing the circuit breaker with a multimeter is very important.
Now, first of all, we will discuss
What is a Multimeter?
A multimeter is a tool for measuring electrical quantities like resistance, voltage, and current. All these meters (ohmmeter, voltmeter, and ammeter) that measures those quantities are combined to a single meter is known as multimeters. There are two types of multimeters:
1. Analog Multimeters
Analog multimeters work on the principle of moving coil meters. These meters use the deflection of an indicator needle to indicate the level of the measurement on an analog display.
2. Digital Multimeters

The multimeter is a measuring instrument that works to combine several measurement functions in one unit. A multimeter can measure volts, amps, and ohms through outlets, fixtures, and breakers.
Tools Required for Circuit Breaker Testing
Two tools are required for testing of circuit breaker with a multimeter
- Digital multimeter
- Flathead screwdriver to uncover the circuit breaker box
The question arises why we need a digital multimeter why we can’t use an analog meter. As a Digital multimeter is easy to use and due to digital display chances of reading error are less. You can use any DMM to measure current, voltage, etc. But keep in mind you should know how to use a multimeter before testing.
Circuit Breaker Warning Signs
Following are the warning signs for circuit breaker
- Burning Smell in the Electrical Panel
- Breaker Will Not Remain Reset.
- Physical Damage.
- Breakers Tripping Frequently.
- Old Age
How to Test a Circuit Breaker Using a Digital Multimeter
There are two methods of testing circuit breakers with a multimeter
1. Voltage Testing
Voltage testing can be performed while the circuit breaker is live. For that, you need to be careful because chances of electric shock are there. That’s why I advise you to don’t go for it until you have an idea about multimeter and breakers. While testing if your meter shows zero reading or any reading below the standard then it’s faulty.

Steps Involved in Voltage Testing of Circuit Breaker With Multimeter
There are the following steps involved in the testing of the circuit breaker
- Open your Circuit Breaker
Open the circuit breaker with a flathead screwdriver. Make sure to unscrew all the screw and hold it till the end.
- Set the Multimeter to AC Voltage
From the Knob of the meter select the Ac voltage. Make sure that the selected voltage is in range, Like if you are working on 110V then the knob position should be at 120V. As discussed before, Put black lead in the common port and red lead in the voltage socket terminal.
- Testing Your Circuit Breaker
There are two types of circuit breaker we will discuss them one by one.
Testing of Single-pole Circuit Breaker
To test the voltage of a single-pole circuit breaker. Put the black lead to the ground terminal of the circuit breaker and the red lead to the positive terminal of the breaker. For 110V reading should be around 120V. In case, if the breaker is showing zero or less the desired voltage then it’s damaged.
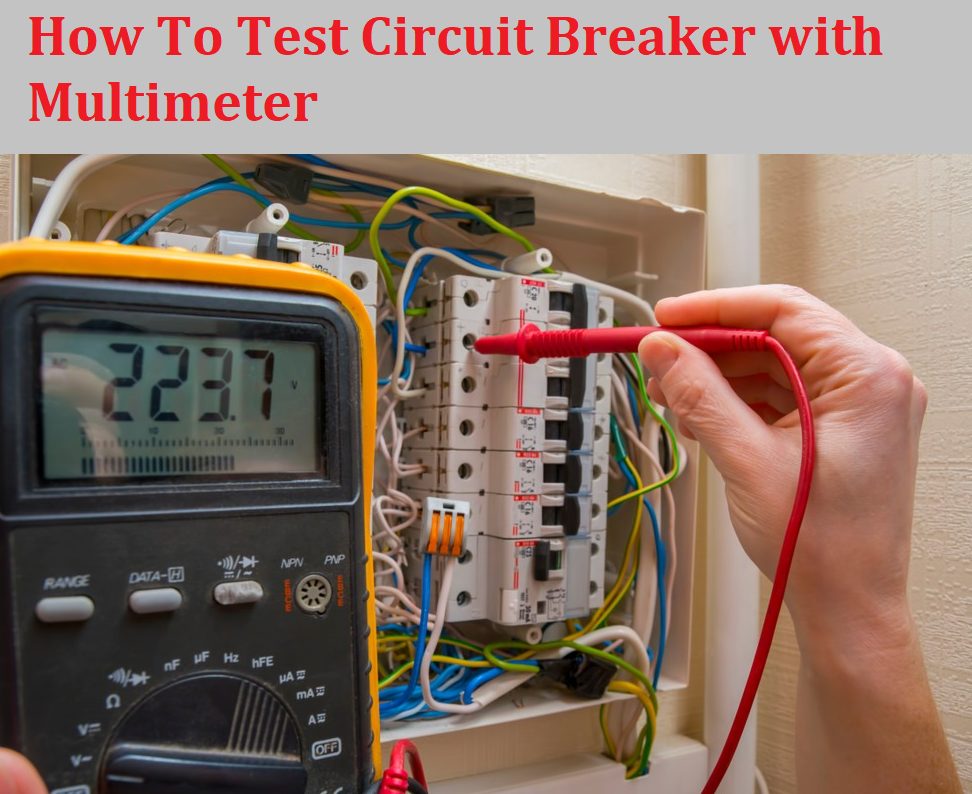
Testing of double-pole Circuit Breaker
Testing of the two-pole circuit breaker is similar to a single pole. As the only difference is no poles. To test the double pole circuit breaker, Put the black lead to the ground terminal of the circuit breaker and the red lead to the one side of the positive terminal. Then move the positive lead to the other side. For 220V reading should be around 230 or 240V.
2. Test Resistance of Circuit Breaker
Resistance test on a circuit breaker is as important as voltage test. If the resistance test failed don’t use a circuit breaker because it will lead to a short circuit.

How to Check the Resistance of a Circuit Breaker
There are the following steps involved in the resistance test.
- Rotate the multimeter knob to ohm.
- Put one lead in the clip or supply terminal
- Likewise, put the other to the screw terminal.
- There should be resistance reading when you turn on the breaker.
- Similarly, no rating when you turn it off.
This test is also similar for the single pole and double pole circuit breaker.
After reading this article “How to Test a Circuit Breaker with a Multimeter ” you will be able to check the circuit breaker. We have tried to cover each aspect of the circuit breaker and will look for more and try to add those in the next update. Have you found anything helpful? Let us know in the comments section below.